I have stood at an airport gate, laptop bag completely unzipped, digging through a tangle of cables trying to find my phone charger before boarding started. The charger was there. It always is. But I spent three embarrassing minutes rooting through it while the gate agent called my row twice. That was the last time I packed electronics without a system.
The fix is not buying more gear. It is deciding, once, exactly where every cable lives and making that decision automatic. Whether you carry a single personal item onto a budget flight or check a hard shell suitcase on an international trip, this five-step system keeps your electronics retrievable in under ten seconds. The FYY Electronic Organizer is the tool I use as the anchor for the whole setup, and I'll tell you exactly how I load it.
If you're still loose-packing cables, you're still losing time at every airport.
The FYY Electronic Organizer has 38,000+ reviews for a reason. Double-layer design, elastic loops for every cable, waterproof lining, and it fits in the top pocket of any carry-on. This is the one I use on every trip.
Amazon Check Today's Price on Amazon →Step 1: Build Your Non-Negotiable Electronics List
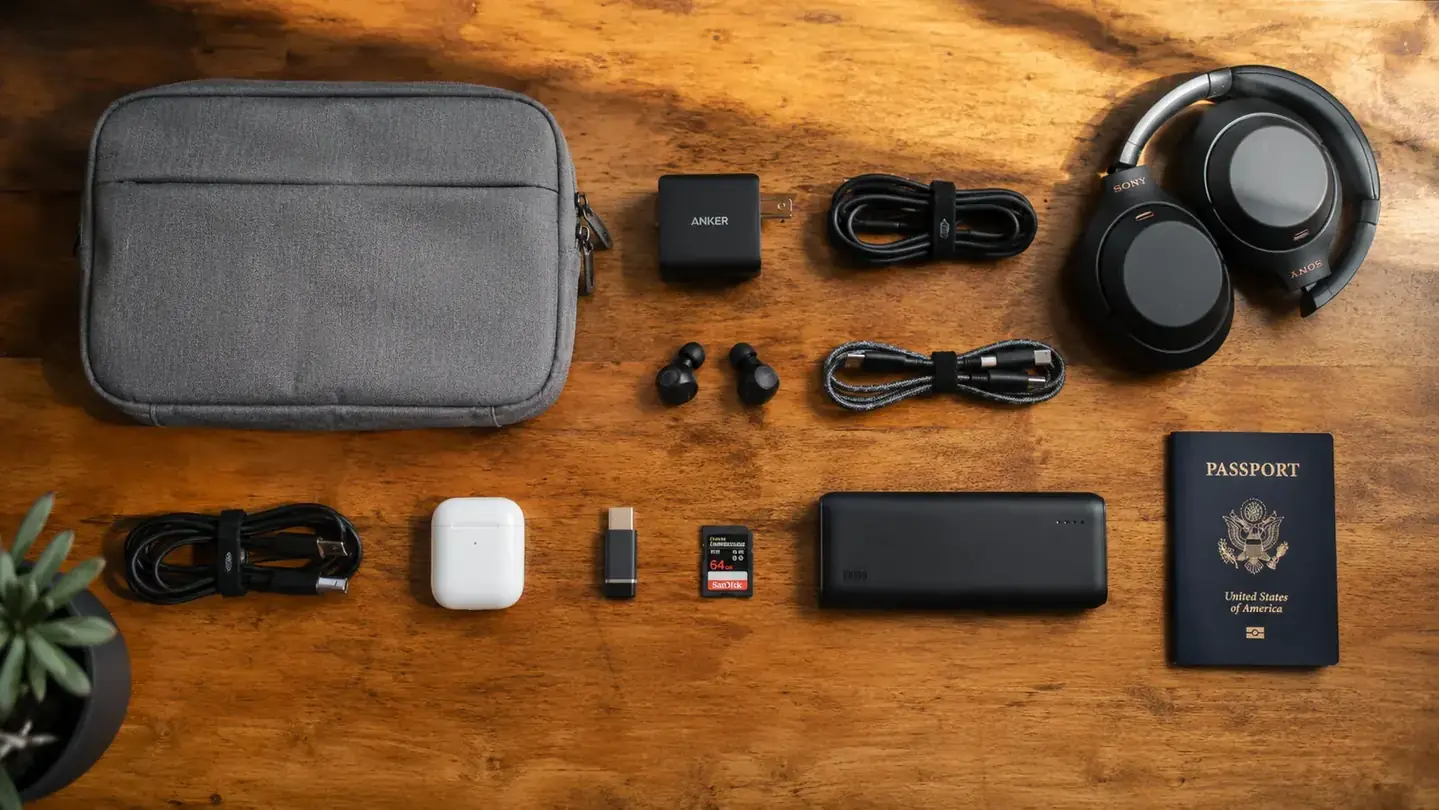
Before you pack a single cable, write down every electronic device you are bringing on this specific trip. Not the hypothetical trip where you might need a GoPro and three lenses. This trip. Most travelers carry the same core set: phone, laptop or tablet, earbuds, power bank, and the chargers that go with each. Some add a smart watch, a Kindle, or a travel router. Write yours down and count the cables required to charge and connect each device.
For a typical five-day trip, I carry: one USB-C laptop charger, one USB-C phone charger (they share a cable), a 20,000mAh power bank, AirPods with their case, and a universal travel adapter for international outlets. That is four items total, three cables, and one adapter. When I see it listed out like that, I immediately know what bag size I need and where every item fits. The list is the foundation. Skip it and you will overpack cables every time.
One audit tip: plug every device into a power strip at home before you leave and make sure each one actually charges. Dead batteries on departure day reveal missing cables faster than any packing list.
Step 2: Choose the Right Organizer for Your Load
The number-one mistake travelers make with electronics is treating the organizer as an afterthought. They grab a random zippered pouch from a junk drawer, shove everything in, and call it organized. Six hours later the pouch is a compressed ball of cables and they cannot tell a USB-A from an HDMI without pulling everything out.
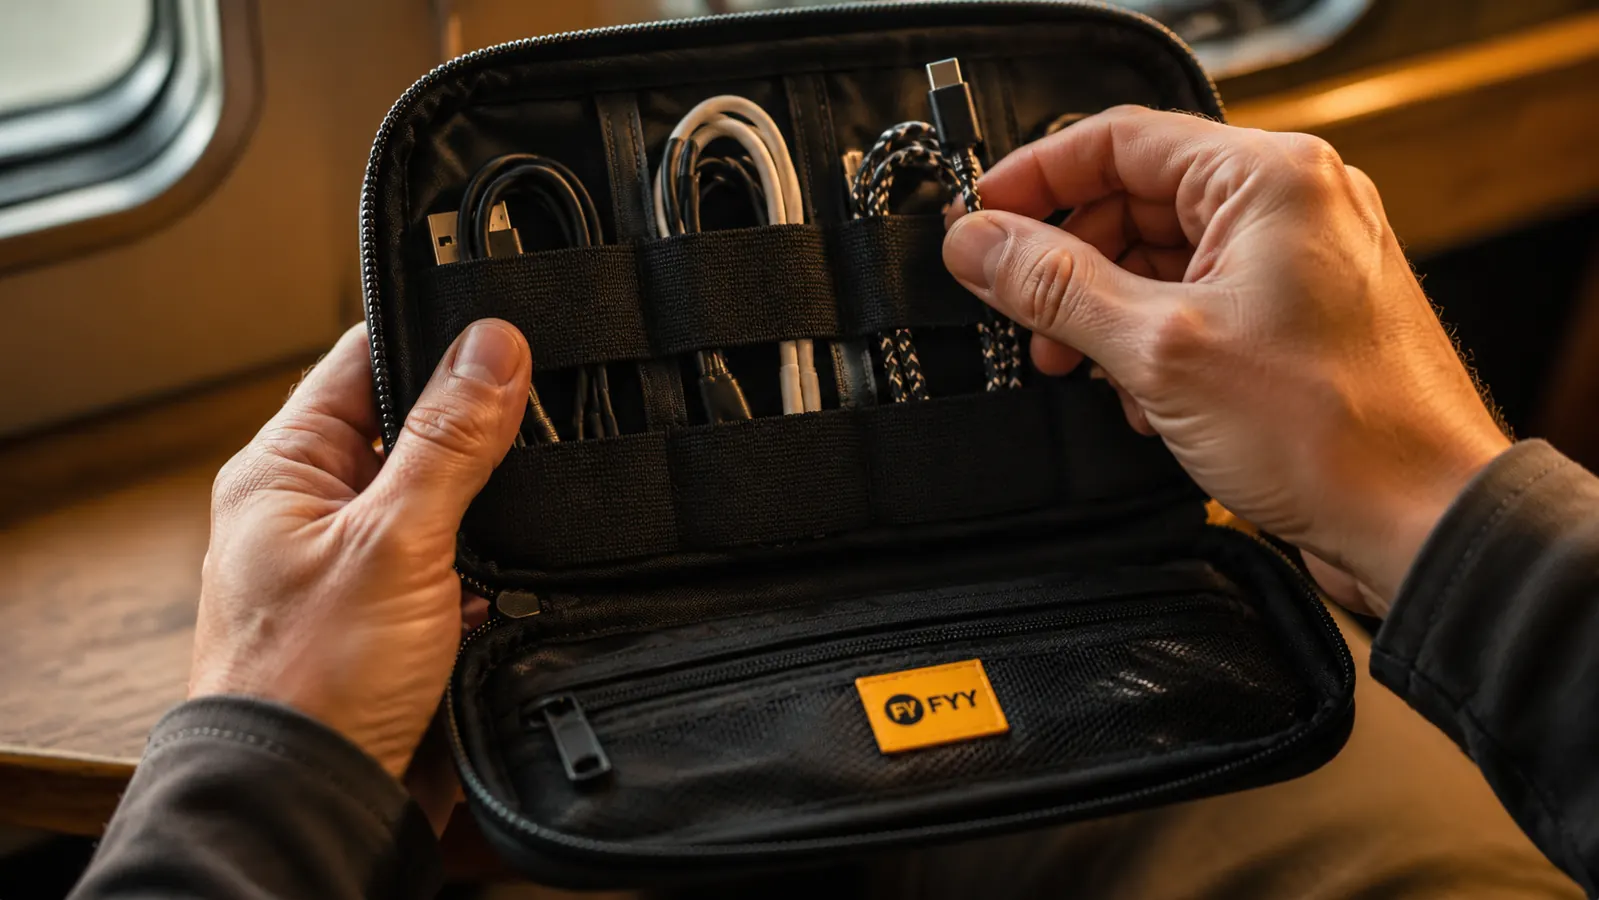
A dedicated electronics organizer earns its space by giving each cable its own slot. The FYY Electronic Organizer works because of its double-layer design: the top layer has elastic loops sized for cables and adapters, and the bottom layer has a clear mesh pocket for larger items like the power bank or travel adapter. Everything lies flat. Nothing tangles. You can see every item through the mesh without opening the bottom section. For a light traveler carrying three to five accessories, the medium size fits into the top slot of most carry-on bags or the front pocket of a 30-liter backpack.
If you are a heavier tech traveler, say you carry a mirrorless camera with two extra batteries and three separate chargers, size up to a large version or consider a two-pouch system. The goal is that every item has a dedicated slot. No loose cables floating around.
Step 3: Load the Organizer With a Fixed Layout
Consistency is what makes this system work. Every time you pack, the same cable goes in the same loop. You stop thinking and start muscle-memorying. Here is the layout I use in the FYY organizer, and you can adapt it to your own gear.
Top layer, left elastic loop: laptop charging cable, rolled into a loose circle. Top layer, center loops: two spare USB-C short cables (one for the bag, one backup). Top layer, right loop: earbuds in their case. Bottom mesh pocket: power bank on the left, universal adapter on the right. That is it. Five items, all visible, all reachable without removing anything from the bag. When I land and need to charge my phone at the gate, I unzip once and the cable is in the same loop it was in when I packed at home.
A few load tips: loop cables loosely rather than wrapping tight. Tight wrapping stresses the cable at the connector end and kills it faster. If you use velcro cable ties, one per cable is enough. The elastic loops in the FYY hold most cables without a tie, which is actually better for the cable long-term.
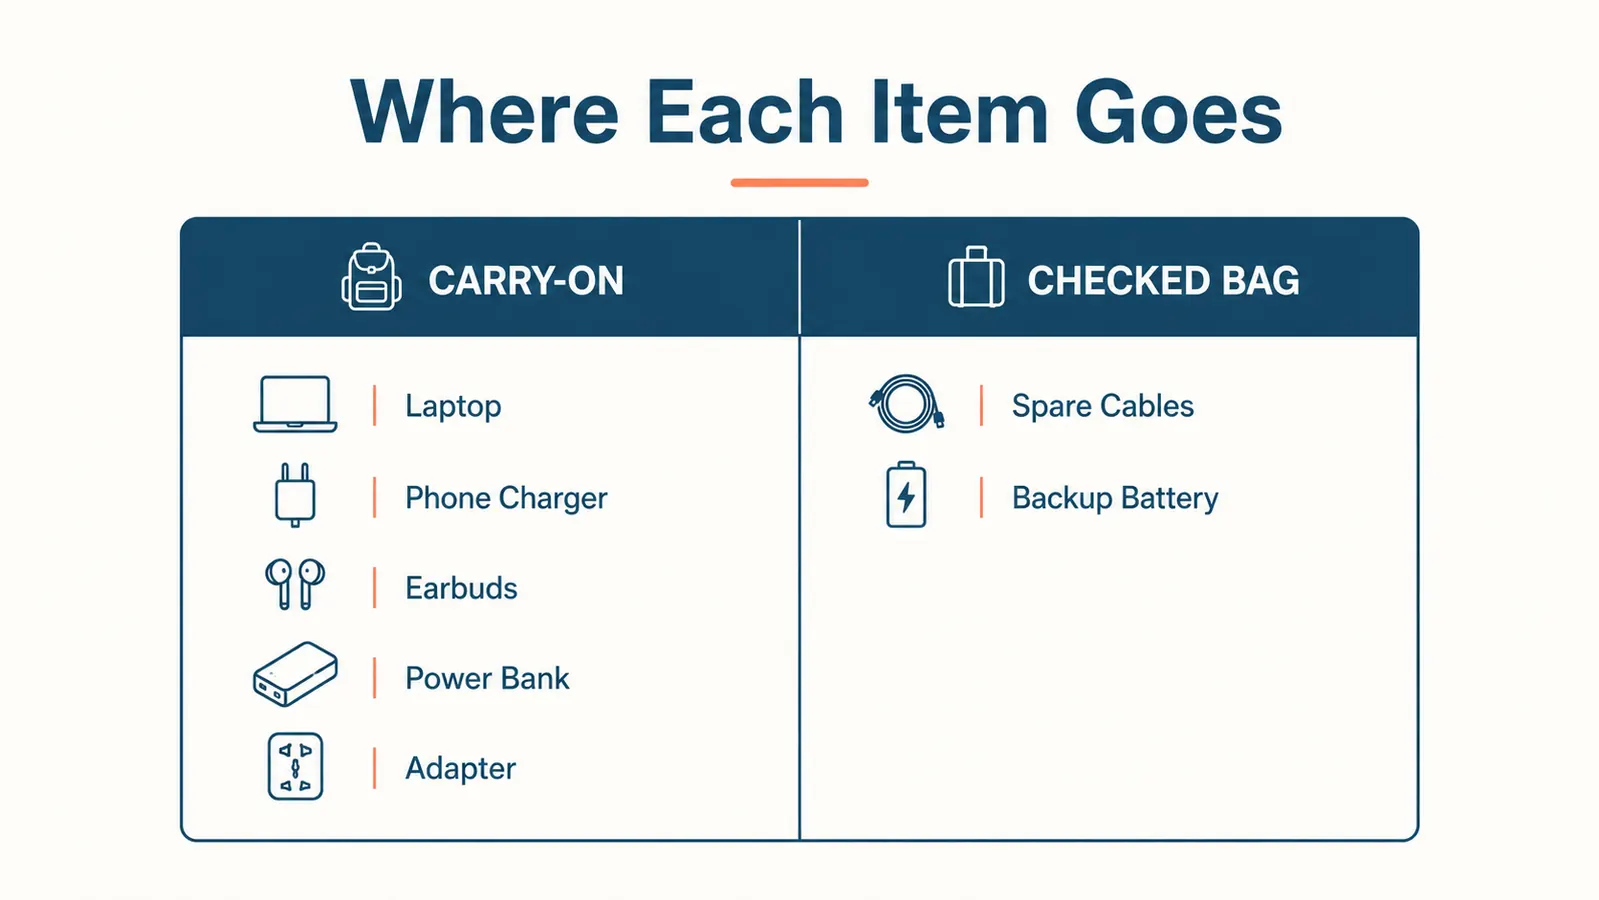
Step 4: Decide What Stays Out of the Organizer (and Where)
Not everything belongs inside the organizer. Your laptop does not go in. Your phone does not go in. The organizer handles cords and accessories only. The devices themselves need a separate, protected spot, usually the padded sleeve of a backpack or a laptop compartment.
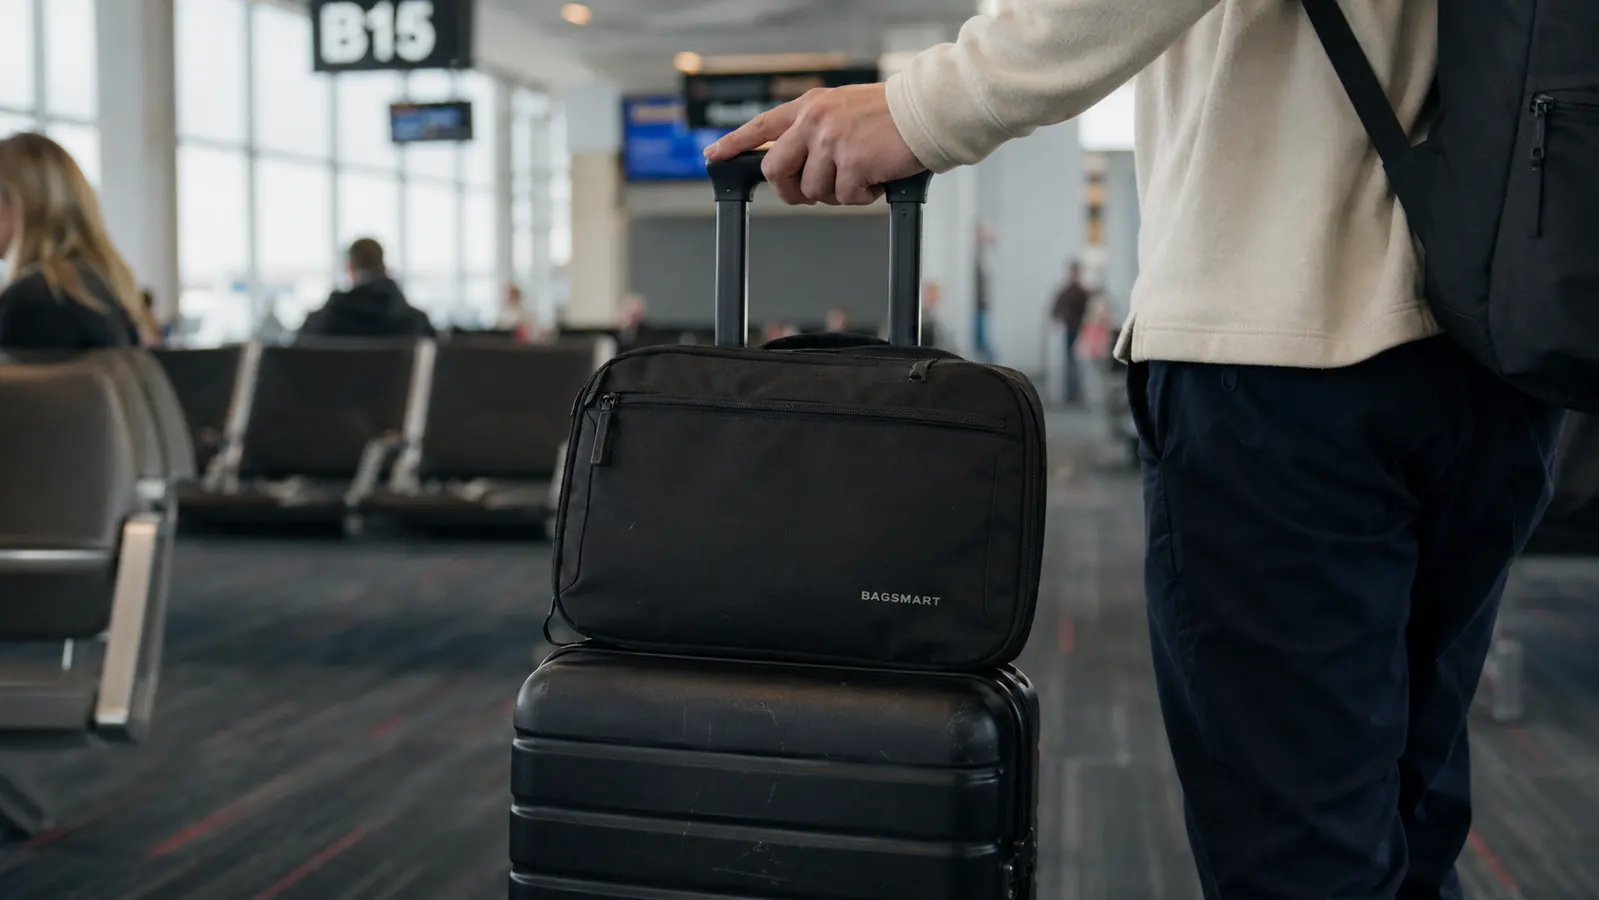
Here is the split I use: the FYY organizer rides in the top grab-pocket of my carry-on. The laptop goes in its own padded sleeve in the main compartment. The phone stays in my pants pocket or the outer bottle pocket of my backpack while I am moving. The power bank moves to my backpack's front pocket once I board, so I can charge during the flight without digging into the overhead bin.
The rule of thumb: if you are going to use it during the flight, it goes somewhere accessible without opening your main bag. If you only need it at the hotel, it can go deeper. Keeping your organizer in the top pocket specifically means it clears TSA security tray separation fast. One grab, out. One grab, back in. The agents like you more and you like yourself more.
The organizer handles cords and accessories only. The devices themselves need a separate, protected spot. Keep that boundary, and you never lose anything.
Step 5: Run a Two-Minute Pre-Departure Check
The night before you leave, open the organizer and do a thirty-second visual scan. Every loop filled? Power bank charged? Adapter packed? If you travel internationally, confirm the right adapter for your destination is in the bottom pocket and not the one from your last trip to a different region. This takes less than two minutes and eliminates the dead-battery, wrong-adapter, missing-cable disasters that seem obvious in hindsight.
Also charge everything the night before: phone, laptop, power bank, earbuds. Leave them plugged in until you pack. You want to board fully charged so the power bank is a backup, not a necessity. A power bank that starts a flight at 40 percent is not as reassuring as one that starts at 100 percent.
After your trip, do the reverse check before leaving your hotel room. Open the organizer, confirm every cable is back in its loop, and do a final sweep of the desk, nightstand, and bathroom counter for chargers. Chargers are the single most commonly left-behind item in hotel rooms. The organizer system helps here too because the empty loop is visible the moment you open the bag.
What Else Helps
The organizer does most of the work, but a few small supporting habits sharpen the system further. First, standardize on USB-C wherever you can. When every device charges the same way, you carry fewer cable types and the organizer layout stays simple. Second, buy at least one spare short USB-C cable and leave it permanently in the organizer. Short cables, around six inches, are easier to manage and fine for charging at a nightstand or airport seat.
Third, if you are a frequent international traveler, keep a second, fully loaded organizer ready to go. I have one that lives packed in my carry-on backpack between trips. The cables in it never leave. When I need to travel, I grab the bag, toss in the laptop, and I am done in three minutes. The setup cost is buying a second set of cables, which is a one-time expense that pays off on every trip after the first.
Fourth, label your chargers with a small piece of masking tape and a Sharpie at group trips and hotel stays. When six people are charging at the same power strip in an Airbnb, labeled chargers come back to you. Unlabeled ones occasionally do not. It takes ten seconds and it is worth it.
If you want a deeper look at how the FYY organizer specifically holds up to extended use and how it compares to other cases at a similar price, the reviews at the links below cover it in detail.
Related reading: FYY Electronics Organizer Review: After 30 Trips, Why I Haven't Replaced It and FYY vs BAGSMART Tech Case: Which One Is Right for You?
The system works best when every cable has a home. Give it one.
The FYY Electronic Organizer is the anchor for this whole setup. Double-layer, waterproof lining, elastic loops that actually hold cables without tangles, and it costs less than a single airline checked-bag fee. Over 38,000 travelers already use it.
Amazon Check Today's Price on Amazon →